User:NexySlime/SanctumDeck
| Heads up! | |
|---|---|
| This page a work in progress. Feel free to help out by clicking the Edit button! | |
Here lists the non-same-faction / random decks for Sanctum that I used
Glacias, the wet dragon
Basics
- Composition
- Glacias, Ella, Albatross, Machina, Rhea/Triaina
Sample Team
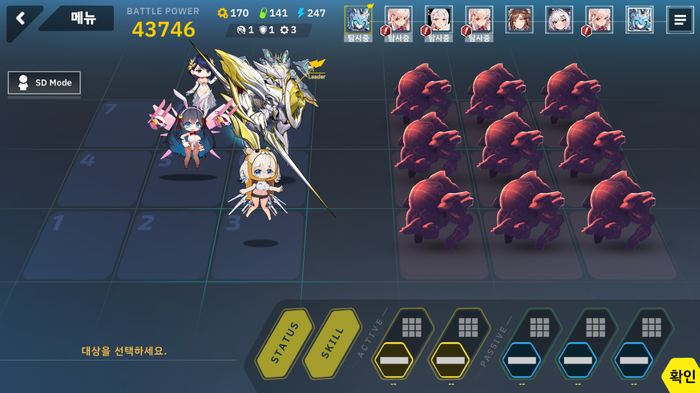
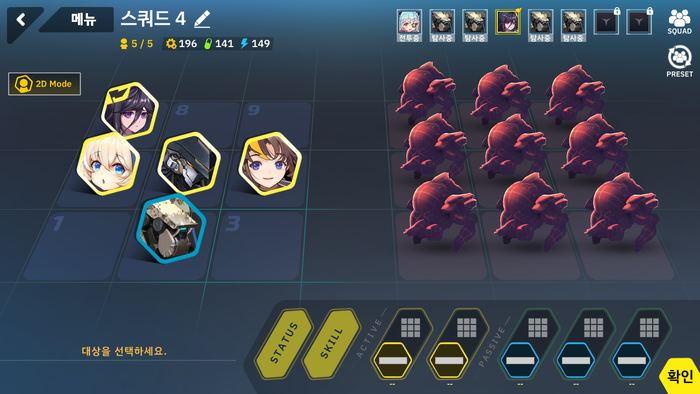
Team Formation: Glacias on Position 9, Machina on Position 8, Rhea/Triaina on Position 5, Albatross on Position 6, Ella on Position 3
Synergy Requirements: Rhea has to move faster than Glacias to build up the synergy (will explain why it matters in how to play section).
Additional Note: Rhea can be replaced with Triaina, similar functions/role with some differences.
| Icon | Unit Name | Role |
|---|---|---|
| Glacias | Main Damage Dealer | |
| Albatross | EVA Buff Tank | |
| Ella | Debuffer / Debuff Cleanser | |
| Machina | Buffer | |
| Rhea | Buffer / Wet Debuffer | |
| Triaina Requires SS rank |
Wet Debuffer |
Deck Advantages and Weaknesses
Pros: Comes with damage nullify, all debuff removal, AoE buff removal
Cons: Strict restrictions on action order and unit selection, disadvantages against enemies with high status resist
Countered By: Destroyer(s) with Aqua Chick, Tracker, Cyclops, Lightning Bomber Type-S, Detector Chicks
How to Play
Rhea's Passive2 grant Flying allies AP and Spd Up at the start of the wave, combined with Machina's Passive2 At the start of round, grant all Flying Support allies AP. Albatross Passive2 also grants allies AP at the start of the wave. The combination of such buffs grants the team a fast start.
Ella's Passive2 equipped with Frost spray reduces all enemies' ice resist which increases the damage that glacias will be dealing, Machina's Passive 1 and Passive 3 grants Glacias Anti type buffs and ATK CRIT buffs
Albatross Passive 3 grants all allies Nullify Damage for 1 instance upon idle, it is vital against enemies with counterattack such as Centurions. Also this Nullify Damage buff could gradually increase the survivability of allies.
Machina's Active 2 grants all flying allies EVA increase, ATK increase, and ACC increase while the effect stacks. Such stats increases the survivability of all allies especially Albatross as we're focused with EVA tanks for this deck.
Ella's Active 2 grants all allies debuff removal, AP, and elemental resistance. These effects increases the survivability of all allies and ensures Glacias could act every round.
Rhea's Active1 reduces the enemies' ice resistance and inflicts wet upon hit, this interacts with both of Glacias' Actives, where glacias could remove all buffs from the "wet" targets and stun them(Active 1) or reduce their SPD (Active 2). Normally enemies don't last more than 1 hit. Hence it is crucial that Rhea moves faster than Glacias to inflict wet on enemies.
Triaina can do what Rhea does, but in a different way and some other differences:
- Triaina Passive 3 can inflict wet at the start of wave and whenever she idles. Due to that, Glacias can release from the stress of being needed to move after Rhea, you can equip Glacias with other chips instead of Stabilization Chips
- Triaina grants higher SPD buffs to Machina and Ella, allowing them to perform more actions over time than with Rhea
- However, all the buffs from Triaina only apply on Bioroids, so Glacias and Albatross won't get buffs from her
- Triaina can be used as another CC unit, Active 2 can stun and remove buffs on enemies if they have Wet effect
Important Notes on Actions
- Albatross idles whenever it is possible
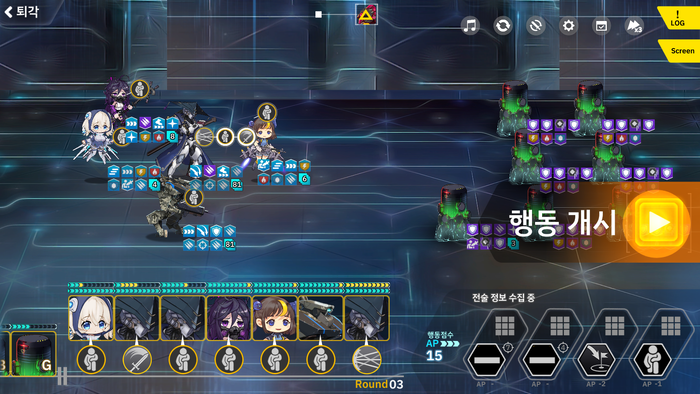
- Crucial: Rhea uses Active 1 or Triaina idles (after Round 2), must be before Glacias, for keeping the "wet" debuff on enemies at all time
- Triaina can use Active 2 if needed
Core Equipment
| Equipment | For | Remark |
|---|---|---|
Ella |
Aforementioned |
Recommended Equipment
| Equipment | For | Remark |
|---|---|---|
Albatross |
Albatross's exclusive equipment, helps to regain AP and trigger passives. | |
Rhea |
Help on getting her to move before Glacias. |
Satgat, the Weeb-Swordsman-Wannabe-Librarian Robot
Basics
- Composition
- Satgat, Hela, Spartan Assault, Black Hound, Ella
Sample Team
Team Formation: Blackhound at Position 6, Satgat at Position 5, Spartan Assault at Position 2, Ella and Hela can be placed at Position 4 and 7, don't matter much.
| Icon | Unit Name | Role |
|---|---|---|
| Satgat SS rank recommended |
Main Damage Dealer / DoT debuffer / Silence debuffer | |
| Spartan Assault Requires A rank |
Buffer / Secondary Damage Dealer | |
| Ella | Buffer / AP pump / Debuff Cleanser | |
| Hela | DEF Down debuffer / Robot AP pump / DEF Up buffer | |
| Blackhound | AP pump / EVA tank |
Deck Advantages and Weaknesses
Pros: AoE Silence debuff, AoE physical DoT debuff, able to deal with enemies with high DEF, damage nullify, damage minimize or high EVA easily, gets a lot of buffs as rounds go and enemies defeated
Cons: Requires a lot of equipment for increasing speed, a lot of idling, needs warm up, half of the damage only comes at end of round, disadvantages against enemies with high status resist and/or debuff cleanse, requires knowledge of forcing extra action
Countered By: Aqua Chick, Tracker, Generator, Predator, Centurion General
How to Play
Hela will inflict DEF Down every round, while Satgat will inflict DoT debuff on enemies with DEF Down effect when he performs Follow-Up / Re-attack. His Active 1 will also inflict DoT debuff when Crit. All these DoT debuffs STACK with themselves.
Satgat's Active 2 doesn't stack with itself, but co-exists with other DoT debuffs, including the aforementioned sources.
Satgat will also inflict DEF Down with his Active 1 when Crit, paired with Hela's debuff, Satgat can make an enemy's DEF down to 0 or negative extremely quick.
Satgat can inflict Silence debuff on all enemies (3x3), delaying enemies' attack, buying more time to deal with nasty enemies.
Spartan Assault can grant a stack of ATK, CRIT and SPD buff, each time he attacks. His buffs make Satgat and him don't really need anything else to increase their CRIT, so the stat points can be put on ACC / ATK, SPD-focused equipment, making them not only able to hit hard, but also fast in action order.
Satgat's Active 2 only has 1 range, how to hit enemies with that? He requires idling after performing Follow-Up / Re-attack, that grants him the Range buff he needed to hit all enemies. The idling will also grant him Ignore Protection Activated buff, making him to kill enemy easier.
As aforementioned points, both Satgat and Spartan Assault require high AP during early rounds, this is where Ella, Hela and Blackhound come in. At start of every round, Ella can grant AP to allies affected by her Active 2 buffs, and Blackhound grants AP to all allies unconditionally. Hela can grant AP to Satgat and Spartan Assault when there is an ally affected by her Active 2 buffs and she idles.
Important Notes on Actions
- Uses Hela's Active 2 on Satgat / Spartan Assault, then idles all the way (can use her Active 1 if needed, but second action must be idling, read Forcing Extra Action section).
- Idling Satgat at least once every round, to keep the necessary buffs up all time
Important
Hela must be Full-Linked and Full-Linked bonus, Buff/Debuff Level +2, is selected (more on this later).
Recommended Equipment
| Equipment | For | Remark |
|---|---|---|
| Helps to speed up the warming up of Spartan Assault, and let Satgat able to do one more action (read Forcing Extra Action section) | ||
Ella |
Helps her to apply her Active 2 buffs in earliest round and start the activation of her Passive 3 |
Forcing Extra Action
(This is sort of a glitch, however it hasn't been fixed by the devs since forever, so I guess it is an intended feature)
(Before reading the rest, go read Speed and AP for some basic knowledge on AP)
(This will be long, so bear with me)
During Action Selection phase, the AP consumption is only calculated when an action is selected, and subsequent action slot will not be removed/reset unless selecting idling (in the action slot before it) or moving to as action. This causes an interesting situation. But before I explain that, let me start with a normal situation:
- Assuming Satgat has equipped with Forced Battle Support Device and 20 AP, and you want to use his Active 2
- His Active 2 costs 10 AP, so 20 - 10 = 10 AP left, he can do a second action
- Select idling, so 10 - 1 = 9 AP left, less than 10 AP, so there is no third action
Now, here comes the interesting situation:
- Same scenario, assuming Satgat has equipped with Forced Battle Support Device and 20 AP, and you want to use his Active 2 as first action
- However, instead of using his Active 2 right away, start with selecting his Active 1, his Active 1 costs 5 AP, so 20 - 5 = 15 AP left, he can do a second action
- Select idling, supposedly his AP will be 15 - 1 = 14 AP left, he should be able to do a third action, but idling is categorized as The Last Action, so it will not trigger addition of action slot, but don't worry, to the next step
- Now click on the first action slot, this will reset it, then select Active 1, see that? A third action slot appears, this is because the game calculates the AP consumption with the AP consumption of second action slot, so as aforementioned, 14 AP left, greater than 10 AP, third action slot is created
- Select Active 1 as third action (why not selecting Active 2? Because there is near-impossible to increase AP to 10 during Action Execution phase, more on this later)
- Now click again on the first action slot, then select Active 2, you will notice that all the following action slots don't get reset. As aforementioned, only The Last Actions (idling / moving to) will remove the action slot
- Voila, this is how you trick the game to do more actions than the AP can afford
Of course, this interaction only works during the Action Selection phase, the AP consumption will still take account of in Action Execution phase. Assuming Satgat's actions are Active 2, idling, then Active 1:
- Satgat uses his Active 2, 20 - 10 = 10 AP left
- Satgat idles, 10 - 1 = 9 AP left, less than 10 AP, the third action is removed from Actions Bar (however, it is not really removed, more like being hid from Actions Queue)
- Hela has used her Active 2 on ally and idled after Satgat has done his action(s), she grants Satgat 1.05 AP (with Buff/Debuff Level +2), 9 + 1.05 = 10.05 AP, greater than 10 AP, so the third action returns to Actions Queue, appears in Actions Bar
- Satgat carries out his third action, uses his Active 1
And that is how this glitch trick works. This trick can be used on any unit with Max Action Up effect.
- Especially Olivia, first action Active 1 > idling in subsequent action slots, loop it during Action Selection phase, then change the idling to the desired Active.


